Monday, July 26, 2010
Wednesday, July 21, 2010
Sewing Again!
I started sewing again!
It's been over two weeks since I've had the time or motivation to sew. I know. It's a terrible feeling.
My apologies to my quilting bee partners for being late with the June and July blocks. I finished the wonky log cabin for Autumn's June kit.
 I have to confess, I'm not a big fan of making wonky log cabin blocks. I always afraid I'm going to turn the block the wrong direction and sew the next log onto the wrong side. But this one was fun. Maybe because it was Holiday fabrics. Maybe because I pretended I didn't have anything else going on so I was able to focus and let loose. I am happy with how this one turned out, so I hope Autumn likes it too.
Next, I am gearing up to make Doris' cyclone block for July.
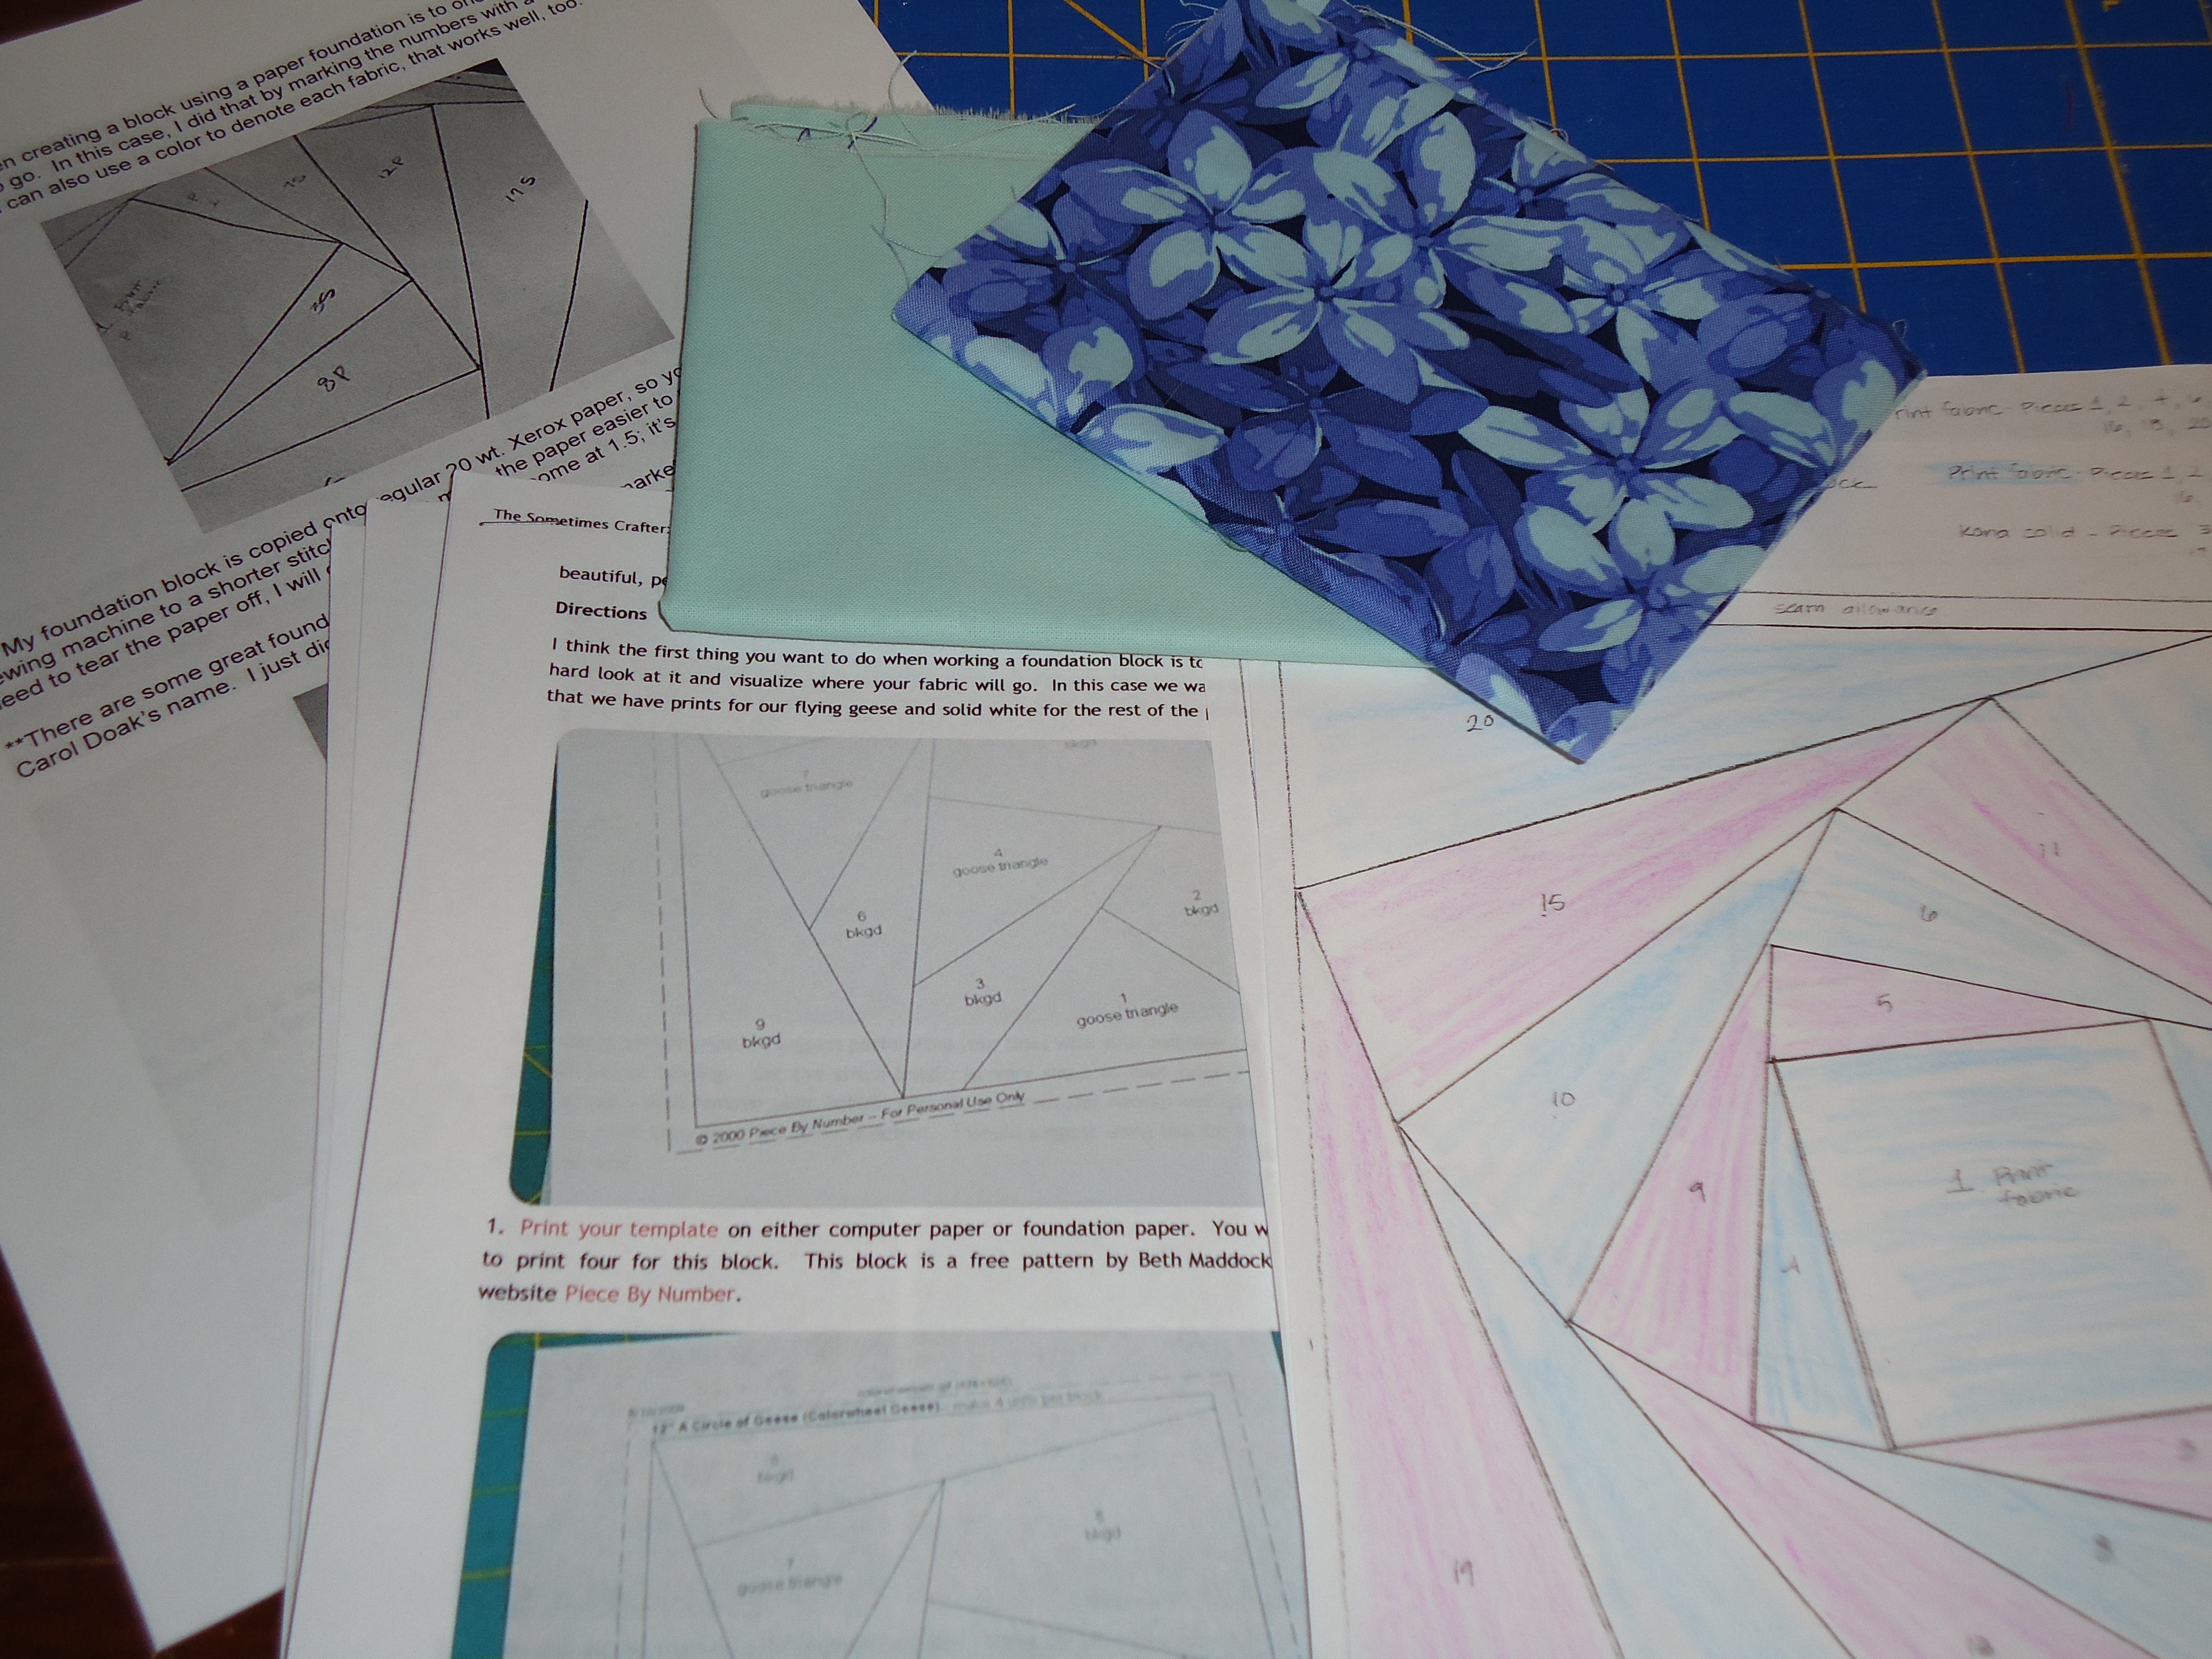
 I've never tried paper piecing before, so I am going to use the tutorial Doris provided and this tutorial for reference.
Once I'm caught up on everyone else's bee blocks, I am planning to get my fabrics ready to mail for my August kit. I'm going to request string blocks for a fall quilt, using these fabrics.
Sure feels good to be in the sewing seat again!
Tuesday, July 20, 2010
Tutorial: Paper Pieced Cyclone Block
Here is the promised tutorial, specific to this block. If you have never paper pieced before, it takes a bit before the "a-ha!" moment comes, because you might feel like you are working backwards or upside-down... you'll see what I mean. The only way to get it is to try it. There are some other great tutorials out there on paper piecing in general, including a good one that Terri pointed out at The Sometimes Crafter.
This is my foundation pattern:
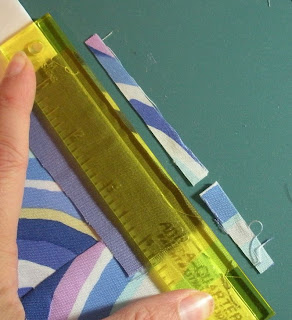
You don’t need any special equipment for paper-piecing, but I do use one nifty tool to trim my seam allowances, the Add-A-Quarter ruler by CM Designs:
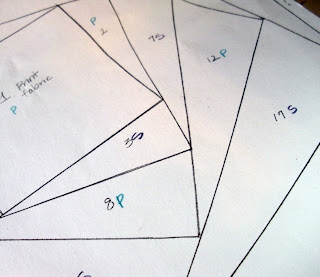
The first thing I do when creating a block using a paper foundation is to orient myself with where each fabric is going to go. In this case, I did that by marking the numbers with a "P" for print or an "S" for solid. You can also use a color to denote each fabric, that works well, too.
3. Place a print rectangle big enough to cover space #2, face down on top of the center square, piece “1”. Hold your paper up to the light, or use a light box, to make sure your fabrics will cover space 1 & 2 while allowing some extra for a seam allowance. Note that #2 fabric is in place of where it will be when you sew the seam, just like it is when you piece normally, not in the place where it will be when you press it open to reveal it's right side.
** I recommend pinning in place, at least the first time around
4. Your first seam will be stitched ON THE LINE between space 1 and space 2. Stitch from just before the first intersection on the line (start of the line), to just beyond the end of that line.
5. Turn you block over face down, and fold the paper back along your seam line. Using a ruler or your Add-A-Quarter ruler, trim to your seam allowance. It is not necessary that it be precisely 1/4", close is good enough.
6. Turn paper over and press seam open.
7. To find your stitch line (necessary since we are using Xerox paper and not transluscent foundation paper), fold the paper and fabric along the seam line between the pieces you have just attached and piece #3. Crease with your fingernail or a stiletto. It will show your seam mark like this:
You can also use a seam roller/presser to reinforce your seam mark.
8. Now lay your next piece of fabric (a solid) right side down, overlapping the crease mark by roughly ¼” to leave a seam allowance. Carefully flip your foundation and fabric over, stitch on seam line for piece #3.
9. Repeat step 5 to trim your excess fabric to the proper seam allowance.
10. Repeat the same process for attaching fabric 4, 5, 6 and so on.
A Few Notes:
**I stop and press every seam open (without steam) to avoid getting “ripples” or "puckers" as I add pieces to my block.
**Sometimes, I will trim a piece before I sew it down. I use the same method of folding back and finger pressing and then cut a roughly 1/4” seam line.
**Remember you are always going to stitch exactly ON your line:
**Your stitch line only needs to extend slightly beyond the ends of the drawn or printed line:
When you get to the edge pieces, stitch through the seam allowance, just past the edge of your paper foundation:
Can we say....
I promised you a tutorial, like, 21 days ago....and I can put things off with the best of them, I tell you. I DO have a tutorial almost ready to post for you. Hopefully will be up by tomorrow. In the meantime, have a gander at my lovely blocks together:
Wednesday, July 14, 2010
Wednesday, July 7, 2010
I did it!
I had very little idea what i was doing but I think I managed
to get a block that resembled yours!
I hope its OK, I know I didn't do it nearly the way you are supposed to.
I ripped out a lot and was worried the paper would fall to bits before I got it done...
See the strings hanging off Jenny EGG? She sits by me when I sew..
And you saw how messy I can be!
she comes out with all the strings all over herself... oh well.
it's in the mail to you tomorrow.
;-)
Hugs to you Doris!
Tuesday, July 6, 2010
Go Cyclones!

Being that my hubby is cyclone all the way...I wanted to change the colors...a little crimson and gold maybe? Just kidding!
Here you go, Doris. I went ahead and did the paper piecing, not my preference, but I thought I'd better not go crazy. (I'd waste too much fabric figuring it out.) Hope it works for you!


